How to make a points system

Points
Creating a points system allows you to transform your chapter by increasing member engagement, improving on campus involvement, and bettering the community through philanthropy engagement. Using Greek Connect to make your system will help you avoid any pitfalls that could lead to a lack of member motivation and trust.
Let's dive into how you can use Greek Connect to create a points system for your sorority or fraternity.
Setup
When creating a new points system, you need to first go to the Points screen and click the "+" button. From here, you can input the name of the system, such as "Service Hours"
Details
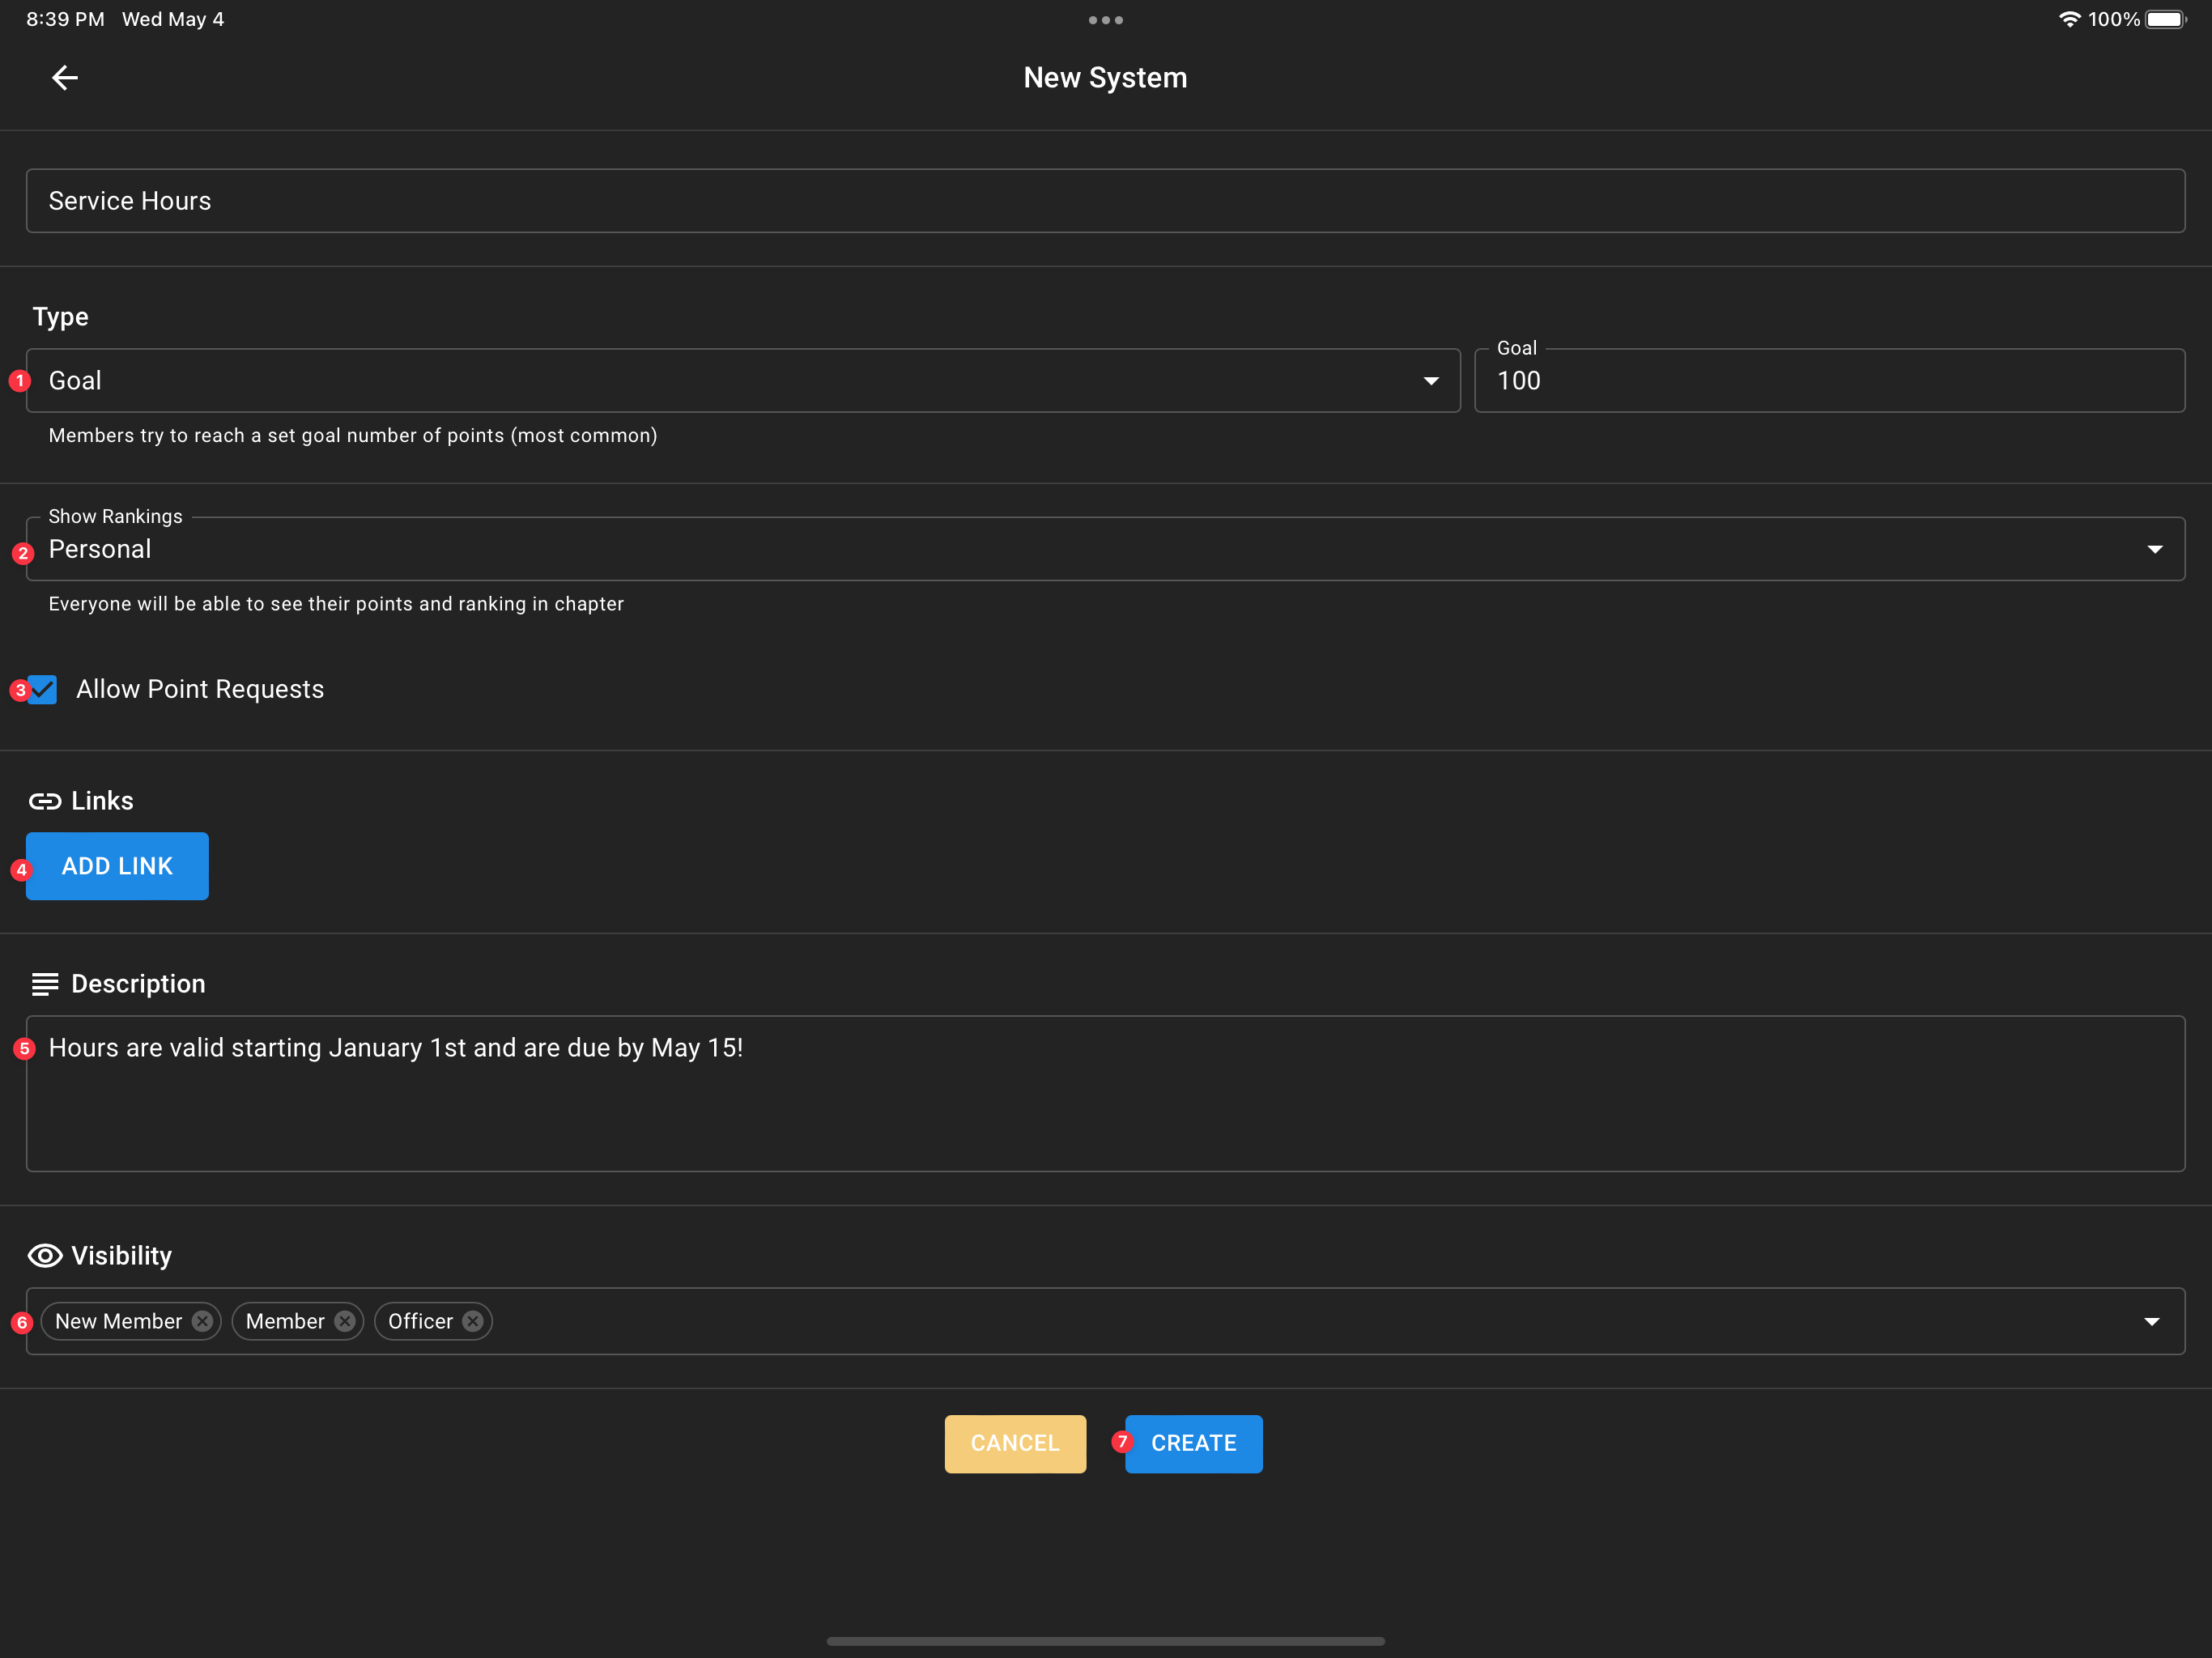
When creating the points system, Greek Connect allows you a wide range of customizability to suit your chapter.

(1) System type
(2) Ranking visibility
(3) Allow point requests toggle
(4) Links
(5) Description
(6) Visibility
System Type
Your points system can be one of two types: goal or maximum. In a goal system, all members have the same set bar that they are expected to achieve. This could be equivalent to 10 service hours or 5 chapters, and it will allow them to easily track their progress as a percentage of the goal. With a maximum system, members do not have a set amount that they are trying to achieve. This could be for a system that tracks fines or member attendance at social events.
Ranking Visibility
You can set the visibility of rankings (meaning what place each member is in relative to their peers) to either be visible to everyone who can see the points system, to admins only, or for members to see their individual ranking (but admins can still see everyones' rankings). Turning it on for everyone to see helps increase transparency when members are not being negatively reinforced.
Allow Point Requests
The allow point requests toggle allows members to submit a point record (including date, title, description, # of points, and a photo) declaring what they believe they should earn points for. Admins will then be able to view the point request and accept or deny it. Until it is approved, the point requests does not affect the member's progress.
Links & Description
You can add relevant links (such as the section of your bylaws that concerns your points system) and a description that members can see for more information regarding your system.
Visibility
You can set the visibility of the points system as well. Anyone who is within one of the relevant statuses will have their own point records associated with the system. Admins can still view the point system if they are not in one of the included statuses.
Managing Points
Adding Points
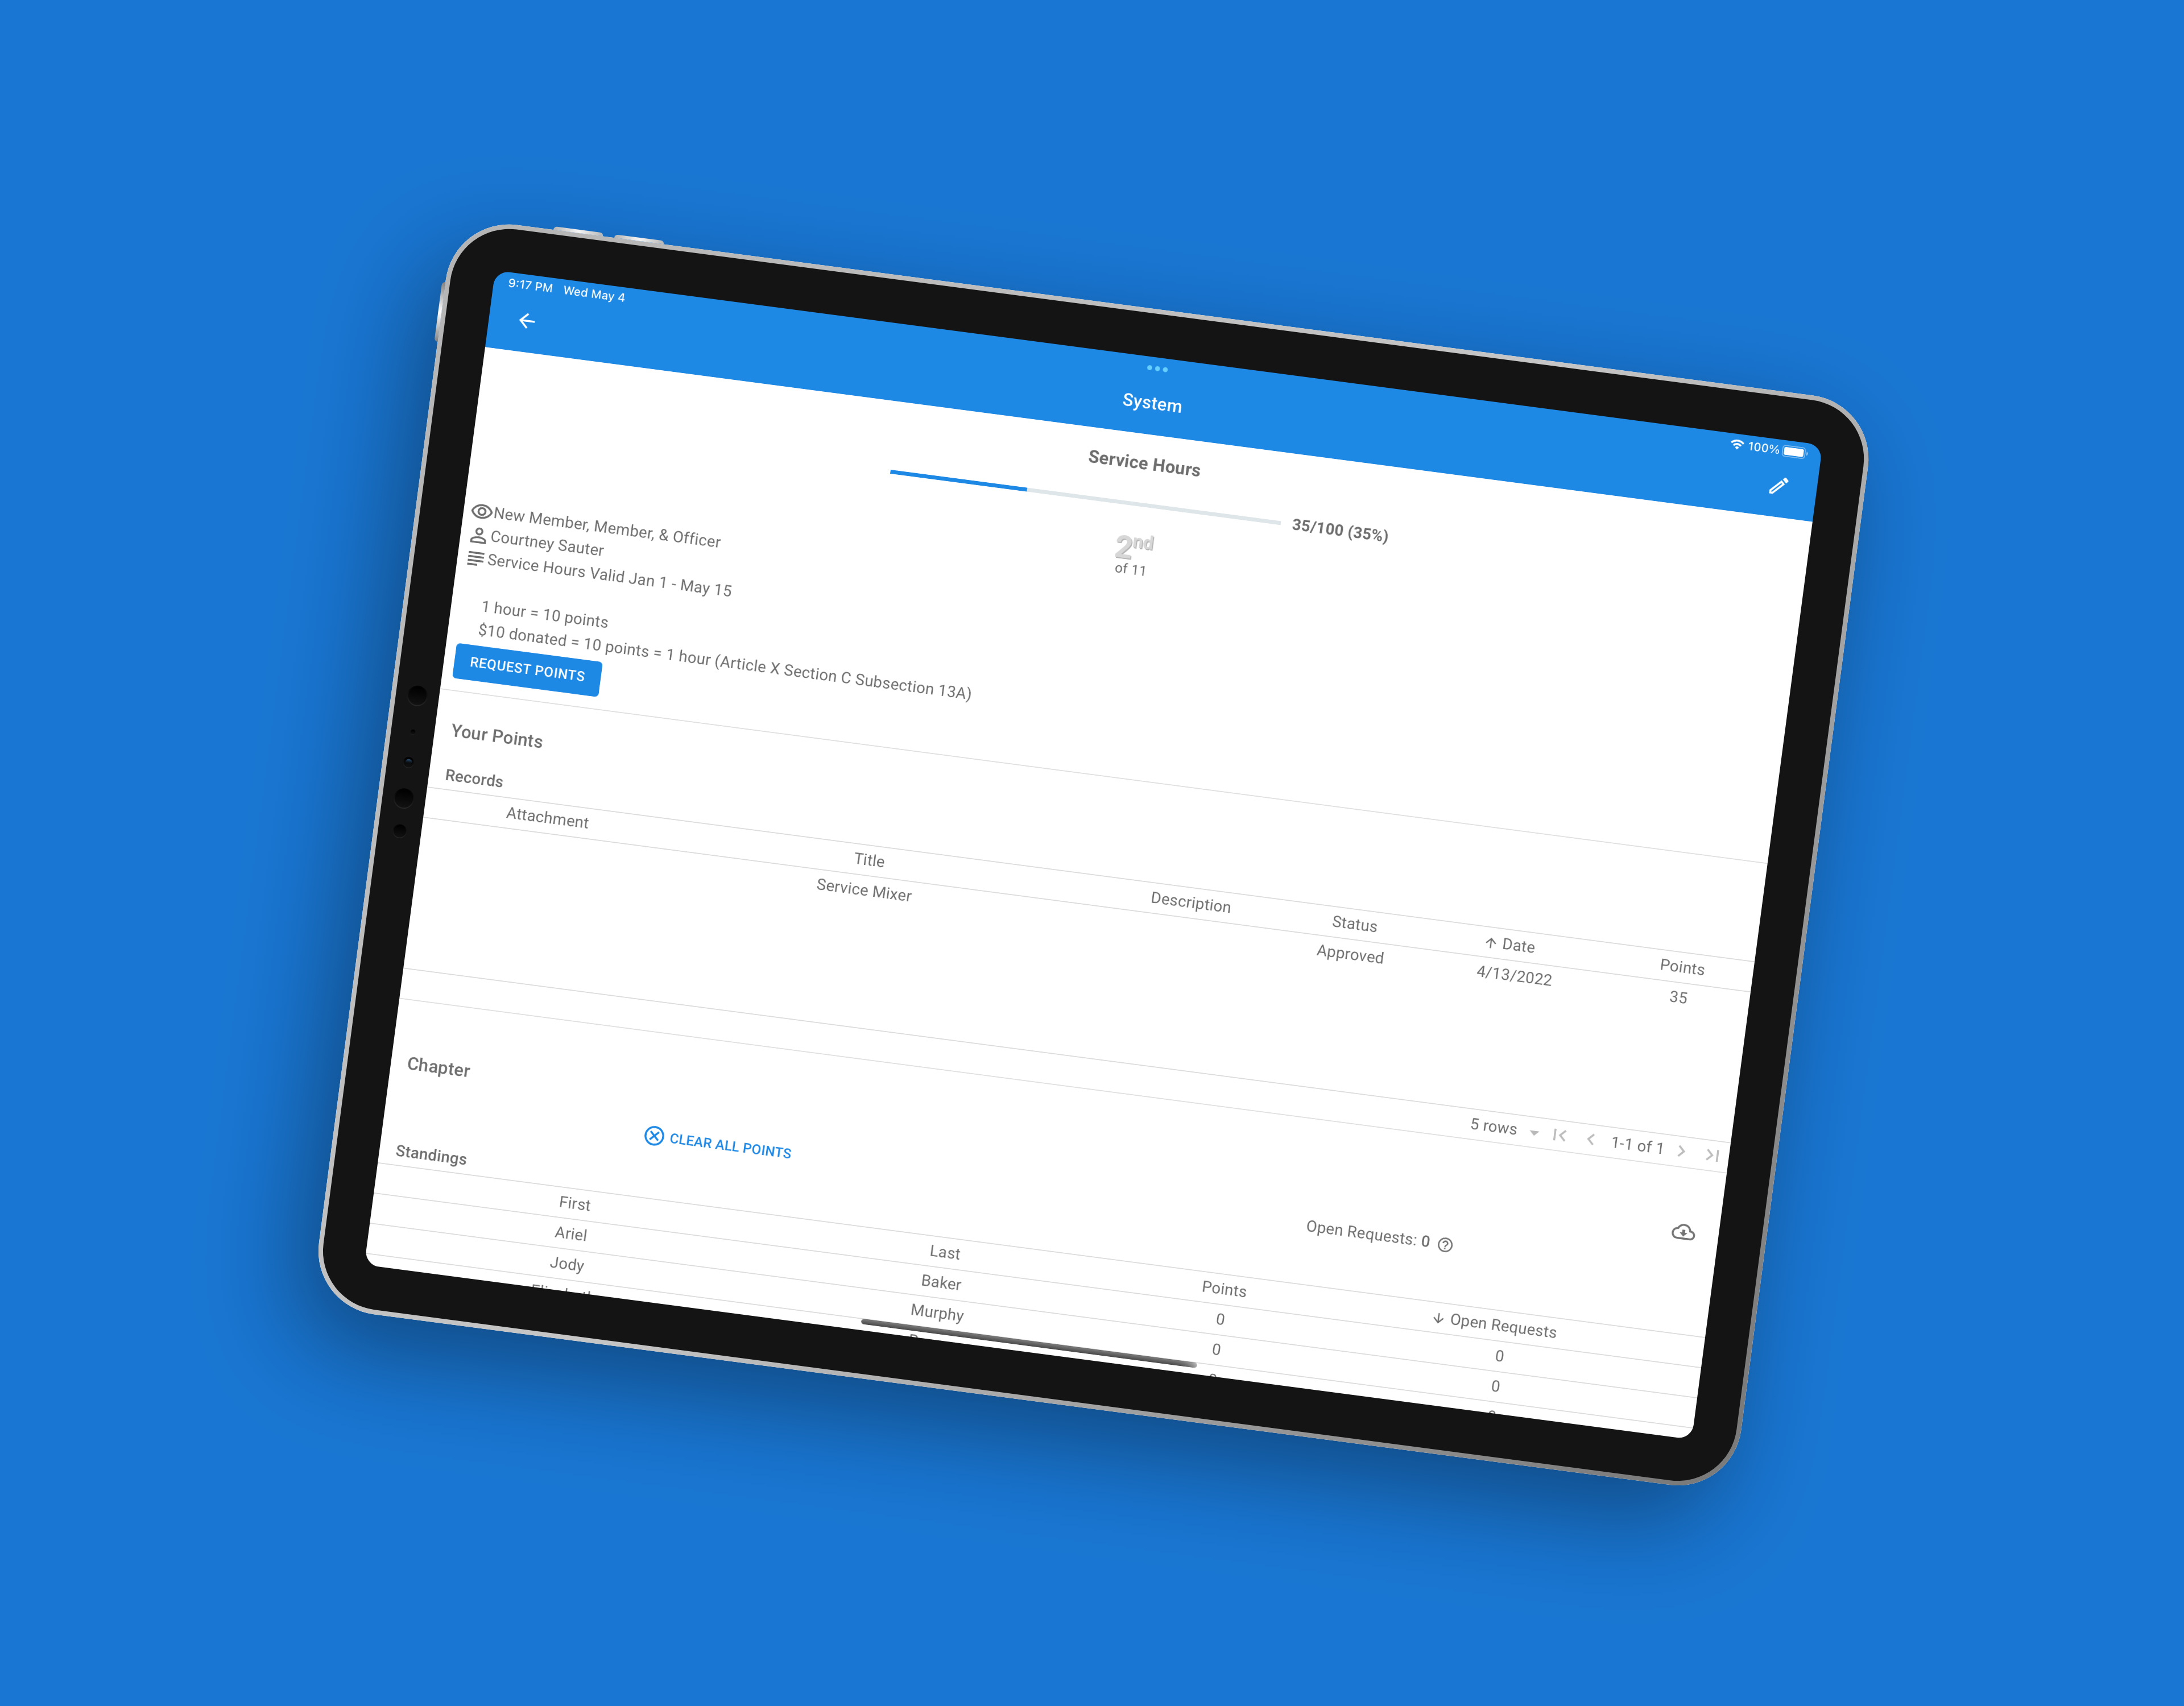
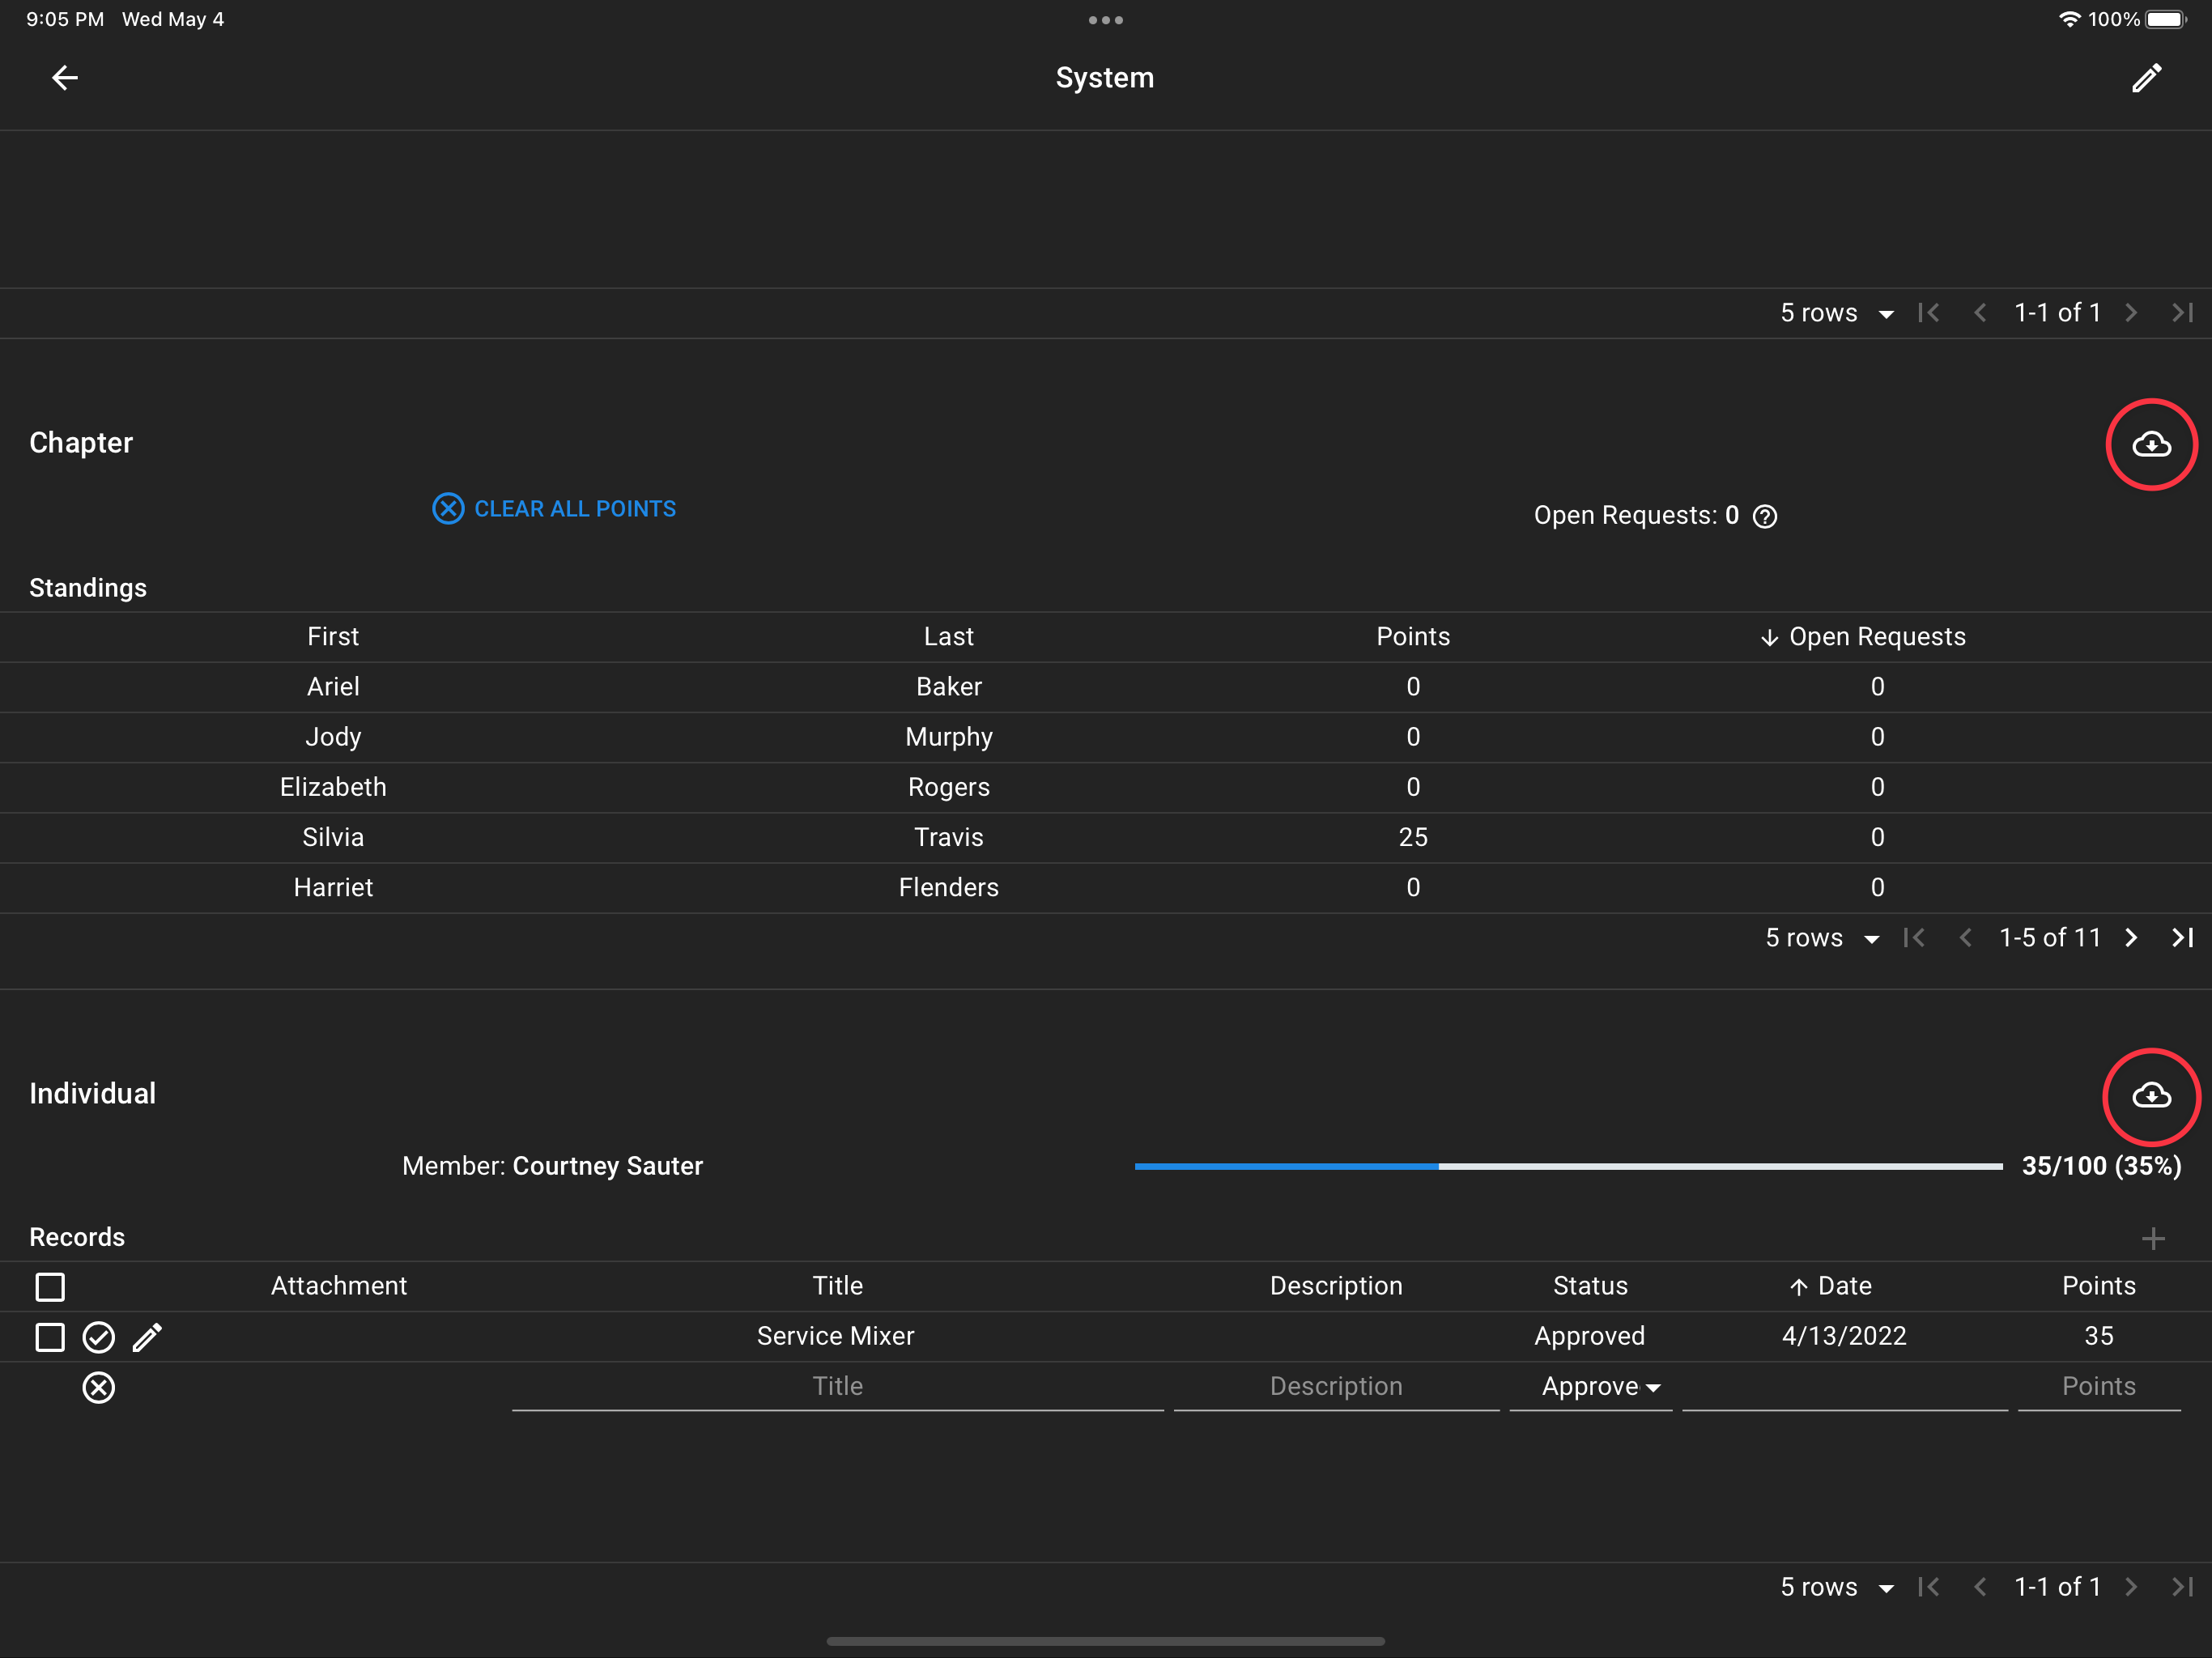
Members can receive points by either using a point trigger from an event, submitting a points request and having an admin approve, or by having an admin manually put in points. You can learn more about point triggers here. For members to submit point requests, they need to select the "request points" button (if enabled), and fill out the relevant fields (photo not required). Then an admin needs, to select their name from the Chapter standings table and click the approve checkbox next to the request. An admin can manually add points, they need to select the member and click the "+" button in the individual records table, and then fill out the relevant fields (and make sure to set the status to approved).
Exporting Points

You can export points for an individual member or all members by selecting the export button from either the chapter or individual tables.
Clearing Points
You can clear all points for the system by clicking the "Clear All Points" button inside of the chapter table. This will effectively reset the system, and it is not reversible. It is recommended to only use this in between semesters to restart the system.
